I’m a very happy SuperDuper user. If you’re not aware, SuperDuper is a Mac app that can create bootable clones from SSDs and hard drives — it’s a great complement to other backup strategies like Time Machine and online backup.1
Saving the date of the last backup
I have a minor quibble with the app, though: it doesn’t save the date of the last backup on the backup drive.
Part of the appeal of using an app like SuperDuper is that the backup is as close to a perfect clone of the source drive as possible. SuperDuper will not write any data to the destination drive that doesn’t exist on the source — not even a tiny little text file with a timestamp.
After-copy script
Thankfully, SuperDuper allows you to provide a shell script that is executed after a backup completes. Even better, the app passes some metadata about the copy operation (such as the paths of the source and destination volumes) to the script as command line arguments.
I wrote myself a little shell script that saves a text file named ___SuperDuper-Backup.txt in the root directory of the destination volume. The output looks like this:
SuperDuper Backup Log
---------------------

Autogenerated by script: /Users/elo/bin/superduper-write-date.sh

Backup finished at: Sat Jan 27 21:00:08 CET 2018

Source volume: Main
Source volume mount path: /
Destination volume: Main-Clone-2
Destination volume mount path: /Volumes/Main-Clone-2
Backup script name: /Users/elo/Library/Application Support/SuperDuper!/Copy Scripts/Standard Scripts/Backup - all files.dset
Disk image name (if any):
I find this very helpful. Sure, you can deduce the time of the backup from system log files etc., but it’s very convenient to have this information readily available, especially if you rotate through multiple drives.
How to install
-
Copy the script’s source code from below and save it to a text file. I named mine
superduper-write-date.shand saved it to~/binin my home folder. -
Open SuperDuper, and click Options…. On the Advanced tab, select the script for the “Run shell script after copy completes” option.
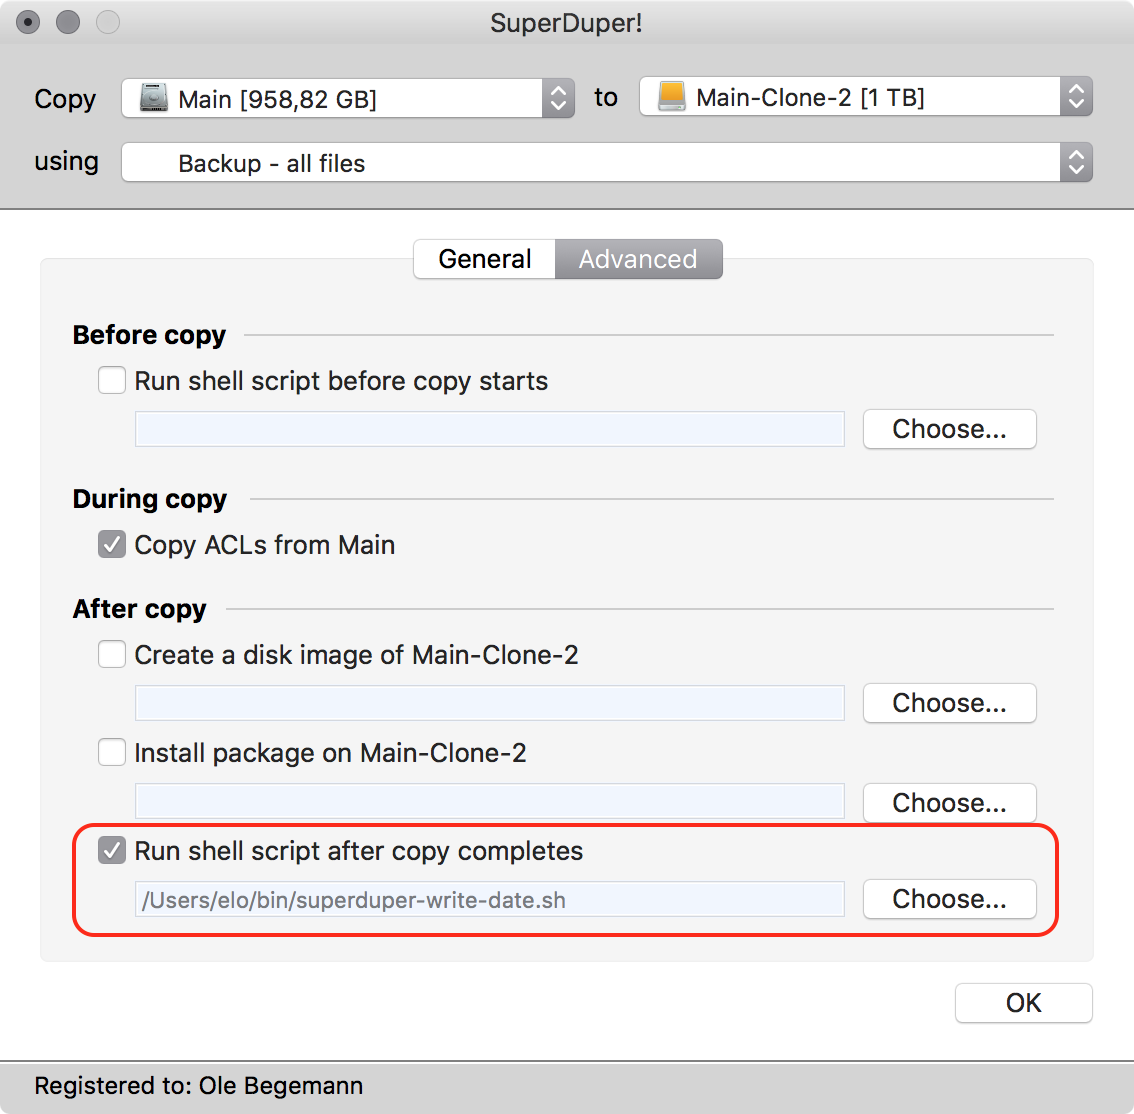
SuperDuper’s options dialog.
That’s it.
The script
Here’s the source code for the script. It’s pretty verbose, but it’s all just error handling and formatting. If you want to change the contents of the log file, feel free to edit the text between <<EOF and EOF. Also, notice the last line: I chose to play a macOS system sound to signal that the backup has finished. Feel free to delete that line or point it to a different audio file.
(Update March 4, 2022) NOTE: Readers have alerted me that the script can fail on modern macOS versions because the root directory on the backup drive may not be writable. The error message will look something like this:
00:00:00 | Error | /Users/XXX/bin/superduper-write-date.sh: line 28: /Volumes/YYY/___SuperDuper-Backup.txt: Read-only file system
The cause of this error is that macOS 10.15 and later split the boot drive into a read-only system volume and a read-write data volume. The script fails when it tries to save the log file to the root directory, which is on the read-only volume.
The fix: edit the script to change the path where the log file is saved (LOGFILE_PATH) to a writable location. I added instructions to the script below.
Note that I don’t use SuperDuper annymore, so I can’t confirm that this works. You’ll have to try it out.
#!/bin/bash

# Log the date of the last backup on a SuperDuper clone
# WARNING: This script overwrites the file /___SuperDuper-Backup.txt on the destination volume.

if [ ${#} -lt 5 ]; then
    echo "${0} error: expected at least 5 arguments, but there are only ${#} arguments."
    echo "Expected list of parameters:"
    echo "1. The name of the source volume (e.g. Macintosh HD)"
    echo "2. The mount path of the source volume (e.g. /)"
    echo "3. The name of the destination volume (e.g. Sandbox)"
    echo "4. The path of the destination (e.g. /Volumes/Sandbox)"
    echo "5. The name of the script the user selected (e.g. Copy – all files)"
    echo "6. (optional) The name of the image file being processed, if any"
    exit 1
fi

SOURCE_VOLUME=${1}
SOURCE_PATH=${2}
DESTINATION_VOLUME=${3}
DESTINATION_PATH=${4}
BACKUP_SCRIPT=${5}
DISK_IMAGE_NAME_IF_ANY=${6}

LOGFILE_NAME="___SuperDuper-Backup.txt"

# If the script fails with a "Read-only file system" error,
# change LOGFILE_PATH to a directory that is *not* on the read-only
# system volume, e.g. your user folder. Example:
#
# LOGFILE_PATH="${DESTINATION_PATH}/Users/YOURUSERNAME/${LOGFILE_NAME}"
#
# (replace YOURUSERNAME with your actual user name)
LOGFILE_PATH="${DESTINATION_PATH}/${LOGFILE_NAME}"

cat >"${LOGFILE_PATH}" <<EOF
SuperDuper Backup Log
---------------------

Autogenerated by script: ${0}

Backup finished at: $(date)

Source volume: ${SOURCE_VOLUME}
Source volume mount path: ${SOURCE_PATH}
Destination volume: ${DESTINATION_VOLUME}
Destination volume mount path: ${DESTINATION_PATH}
Backup script name: ${BACKUP_SCRIPT}
Disk image name (if any): ${DISK_IMAGE_NAME_IF_ANY}
EOF

afplay /System/Library/Sounds/Purr.aiff
-
SuperDuper Developer Dave Nanian wrote a great series of articles about his struggle to implement APFS support in the app. I highly recommend these posts if you’re interested in APFS and what it takes for backup software to support it. Start with this post from September 2017 and then work your way forward. Money quote:
APFS is basically undocumented.
↩︎