Kaffeekasse (German for a shared pool of money in an office that people use to buy coffee and other beverages) is the name of a sample project I created to experiment with Apple’s Passbook technology, introduced in iOS 6.
The idea of the project is that members of CodeKollektiv (the office I share with other developers) can deposit any amount of money in the kitty. The deposited amount will be credited to your personal balance (as shown on your pass in the Passbook app), which you can then use to buy drinks from the communal pool (a.k.a. fridge). It works just like a store card.
In this tutorial, I will discuss the sample app and give you a step-by-step guide to get it running on your network. An important note before we begin: no part of the server or client app has been written with security in mind. In fact, the server is a totally open door and does not even have the simplest password protection. You should NEVER EVER deploy this code on the open web, it is only suitable for experiments on your local network.
The Server
If you have never taken a look at Passbook before, I recommend you first watch WWDC 2012 sessions 301 and 309 (Apple developer account required), which provide an excellent overview and introduce Apple’s own reference server implementation, written in Ruby. You can download Apple’s client and server sample code in the Passbook Support Materials package.
The essential component of a Passbook infrastructure is a web server that implements Apple’s Passbook Web Service API, a list of five requests that the Passbook app on an iOS device uses to interact with the server a pass belongs to.
My own server implementation is an extension of Apple’s reference server. While Apple’s server only serves the same sample pass to each device, I used Sinatra to extend the server with a simple user model. You can create multiple users, each having their own separate account balance and therefore their own unique Passbook pass.
Here is how to set up the server on your Mac:
1. Install Xcode and the Command Line Tools
If you haven’t done so already, install the latest Xcode version from the Mac App Store and then install the Xcode Command Line Tools from Xcode’s preferences panel. We will use Xcode later to build the iOS app. We require the command line tools to have a working Git installation, so if you have installed Git from another source, you can omit this step.
2. Get the Code From GitHub
Open Terminal and change to a directory of your choice. Then type this command to clone the code repository from GitHub:
> git clone git://github.com/ole/Kaffeekasse.git
> cd Kaffeekasse/pass_server
The Git repository contains both the server (in the pass_server directory) and the iOS app, which we will discuss later.
3. Install the Required Ruby Gems
Enter these commands to install additional gems required by the server.
> sudo gem install sinatra rack sequel sqlite3 json rubyzip zip-zip
> sudo gem install lib/sign_pass-1.0.0.gem
The sign_pass gem is a library written by Apple for signing Passbook passes. Its full source code (incl. an Objective-C variant) is part of the Passbook Support Materials package. Pass signing involves several steps, all of which are performed by this library:
- A raw, unsigned Passbook pass consists of a JSON file containing the actual pass data and several PNG images for icons and logos in separate files. The number of images required varies a bit by pass type. All of these files must be consolidated into one directory.
- Next, the signing library creates the pass manifest, another JSON file that contains a list of all files comprising the pass and their hashes.
- The manifest file must be signed with the pass certificate (generated by the pass creator).
- The final pass is a ZIP file containing all these files with the
.pkpassfile extension.
4. Create a Pass Type ID and Download Certificates
Go to the iOS Provisioning Portal. If you are an active iOS developer, you will already have Apple Worldwide Developer Relations Intermediate Certificate in your Mac’s keychain. If not, download it from the Distribution section.
Next, you need to create a pass type identifier. Just like a bundle ID uniquely identifies an app in the Apple universe, a pass type ID is the unique identifier for a specific kind of pass. In the Pass Type IDs section, create a new pass type identifier. It should be of the form pass.com.yourdomain.passname. After creating the pass type ID, you can download the pass certificate. The certificate is used for pass signing and sending push notifications with pass updates to iOS devices.

5. Install the Certificates on the Server
After downloading one or both certificates, double-click the .cer files install them in your Mac’s keychain. Then launch Keychain Access. Locate the Apple Worldwide Developer Relations Certification Authority certificate and export it as a .pem file. Save the exported file to the pass_server/data/Certificate directory.
Next, locate the certificate for your pass type ID in Keychain Access and export it as a .p12 file. Again, save the exported file to the pass_server/data/Certificate directory (the filename does not matter). Make sure to remember the password you have given to the exported file.
6. Edit the Server’s Config File
Open pass_server/config.ru in your editor. Replace these fields with your specific configuration:
:hostnamemust be the name or IP address under which the pass server is accessible on your local network. My Mac’s name if “Tiefflieger” so I enteredtiefflieger.localhere. You can look this name up in System Preferences > Sharing.:pass_type_identifiermust be the same string you used to create the pass type ID and certificate in the Provisioning Portal.:team_identifiermust equal the team identifier of your developer account with Apple. It’s a 10-digit alphanumeric string. You can find it in the Developer Member Center under Your Account.
The server needs to know these settings to fill in the pass template with the correct data. For example, a pass contains the URL of the web service API endpoint the iOS device uses to communicate with the server.
7. Edit the Pass Template (Optional)
Take a look at the folder pass_server/data/passes/template. This directory contains the pass template from which the server builds the passes for each user. The most important file is pass.json, which defines your pass’s contents and format.
Note the storeCard dictionary at the end of the file. It indicates the type of our pass, as opposed to a boarding pass or concert ticket. Apple displays pass data differently depending on the type. Please do not change this for the moment. Also note the fields whose values are "---". These are placeholders whose actual values will be filled in dynamically with data from the database when the server generates a pass for an actual user.
You do not have to edit the pass template, but you are free to change the following fields to define the pass’s appearance:
- Strings like
organizationNameanddescription. foregroundColorandbackgroundColor.- The
locationsfield. If a device where the pass is installed is close to one of the (up to 10) locations listed here, iOS will display the pass on the lock screen (like a notification). - The
currencyCodeof thebalancefield (default is “EUR”).
You might also want to replace the icon.png and logo.png files (and their @2x versions) with your own artwork. Note, though, that these files must be present. You will not get a valid pass if you simply delete them.
8. Setup the Pass Server’s Database
Type these commands to create an empty database for the server:
> lib/pass_server_ctl.rb --setup
Loading the database file
Creating the users table
Creating the passes table
Creating the registrations table
Reference server setup complete.
9. Disable the SSL Requirement for Passbook
On your iOS device, go to Settings > Developer and under PassKit Testing, enable the switch named “Allow HTTP Services”. This tells Passbook to talk to the server even though the communication is not SSL-encrypted. Your iOS device must be enabled for development in Xcode in order to show this option. In a production environment, your server must support HTTPS.

10. Start the Server
This command will start the server:
> rackup -p 4567
Please enter your certificate password:
The server will first ask you for the password of your pass certificate that you chose in step 5. The server requires the password to sign passes and send push notifications.
Update March 5, 2013: I fixed a small bug in the server that caused an exception when the server ran on Ruby 1.8.x and a user tried to download a pass. It should now run fine on both Ruby 1.8.x and Ruby 1.9.x.
11. Create a User Account
Open Safari on your iOS device and go to http://myhostname.local:4567. The server’s (bland) home page should show up. Tap the Users link to display a list of users, initially empty. Tap the link to create a new user and enter your data. The email address doesn’t have to be valid. In fact, the server ignores that field completely at the moment. For Balance, enter the amount the user should have as the initial balance on their card.
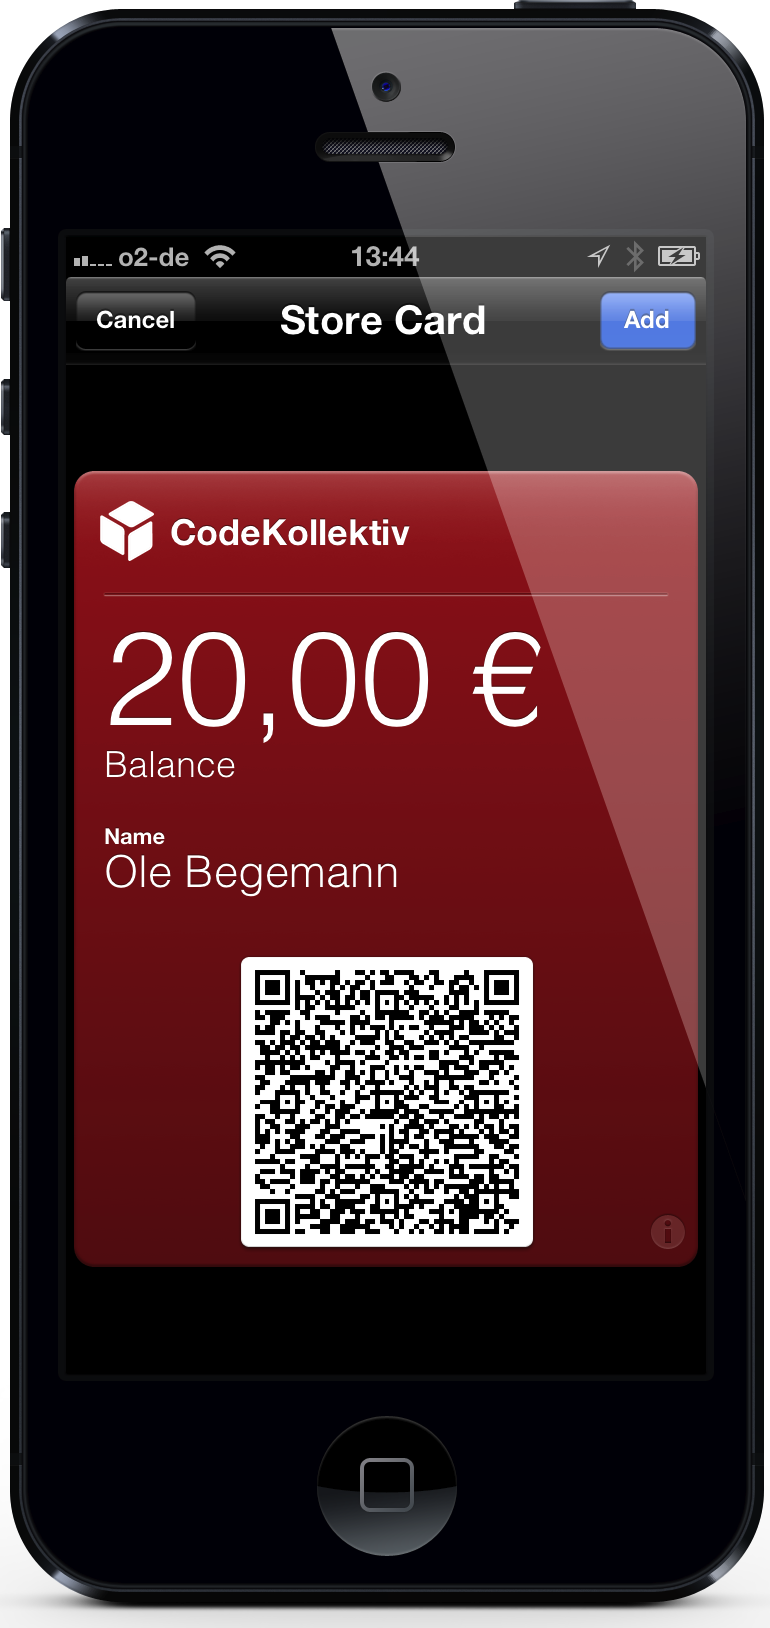
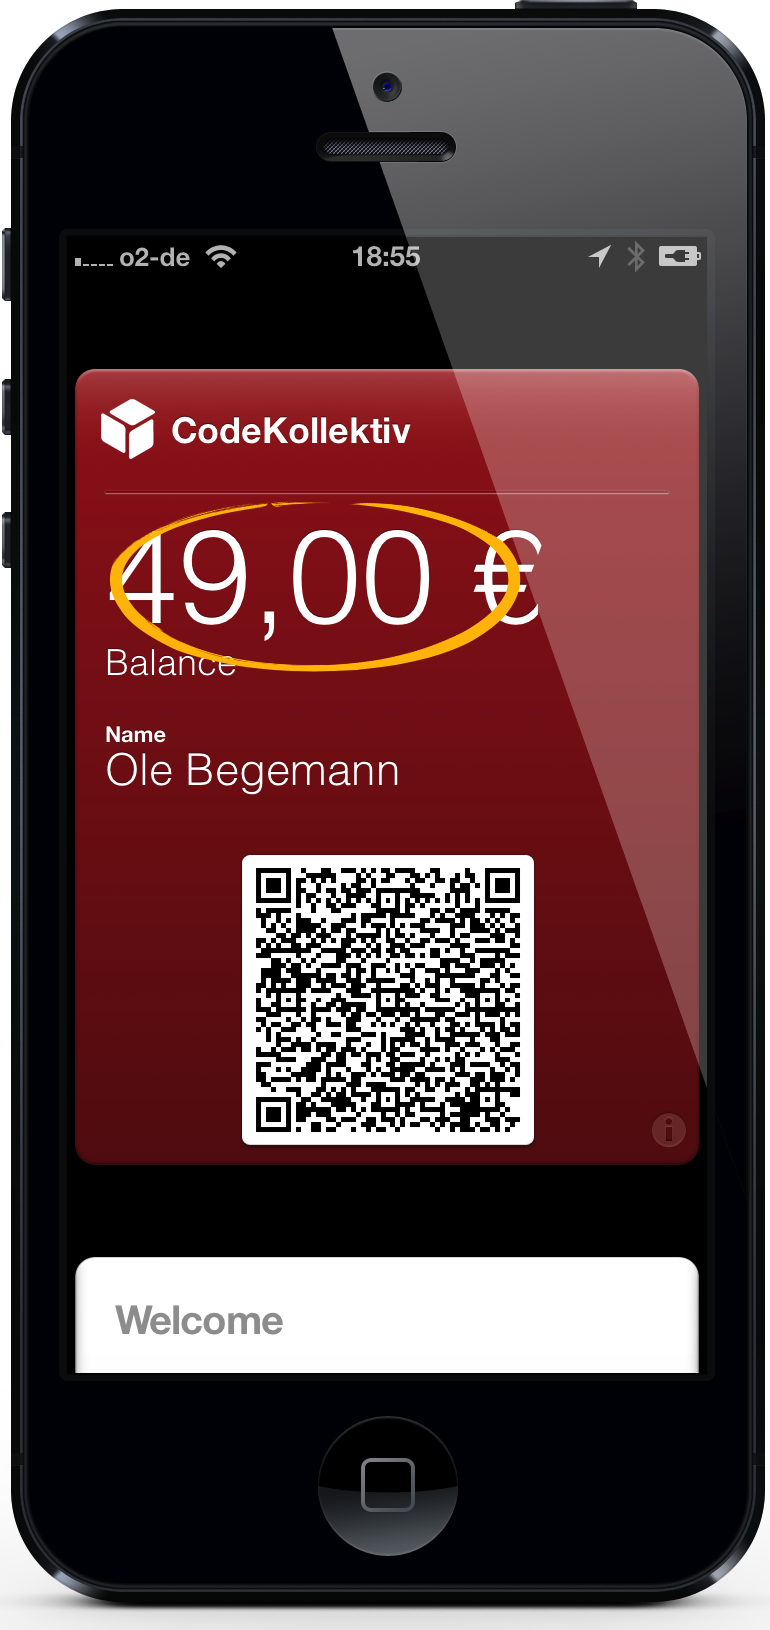
When the server has created the user, tap the user’s name to get to their details page. Tap on the Download Pass link. The server will now generate a signed pass for this user (based on the template pass) and send it to the client. Mobile Safari will display a preview of the pass and offer you to add it to your Passbook.
Finally, open the Passbook app and check out the newly added pass.

12. Initiate an Update on the Server
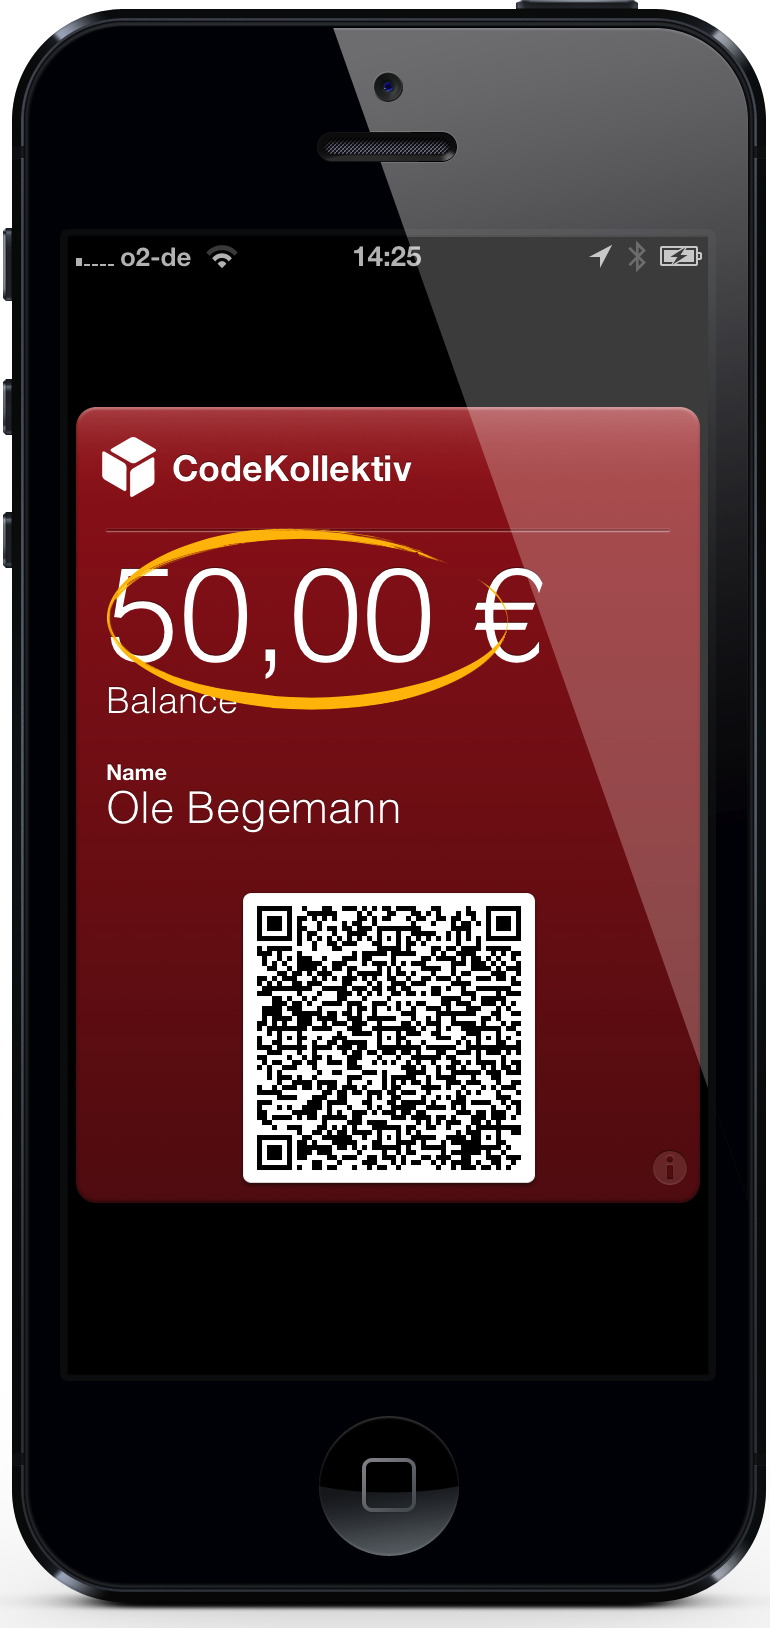
Now lets change some data on the server and see how Passbook reacts. Open http://myhostname.local:4567/users in a browser on your Mac and edit the user’s account balance, say from 20.00 to 50.00. Then save. If all goes well, your device should display a notification after a few seconds, notifying you about the update.
It is worth noting here that even though it looks as if the push notification contained the updated pass data in its payload, this is not the case. In fact, the device first receives a silent push notification whose purpose is only to notify Passbook of an available update. The Passbook service will then contact your server in the background and re-download the entire pass. Only when this download has finished will the device show a visible notification to the user.
You can see follow flow of events in the server logs. After updating the user data in the web browser, the server sends a push notification. And only after the push notification has been sent, the server receives the actual request for the updated pass data (in this case: webServiceURL/version/passes/passTypeIdentifier/serialNumber).
13. Check out Other Parts of the Passbook Web Service API
Watch the server logs in Terminal while you play around with the pass in the Passbook app. For instance, watch what happens when you delete the pass from Passbook: in this case, the device sends a DELETE request to webServiceURL/version/devices/deviceLibraryIdentifier/registrations/passTypeIdentifier/serialNumber, to which the server should react by removing this particular registration (what Apple calls a device-pass combination) from the database. Try to find the corresponding method in the server code (in pass_server.rb).
If this request fails for some reason, Passbook will retry it from time to time.
14. Learn About pass_server_ctl
pass_server_ctl is a helper script that allows you to control parts of the application from the command line instead of a browser. Enter
> lib/pass_server_ctl --help
to learn more about the available options. One useful command is pass_server_ctl --push, which sends a push notification to all registered devices, forcing them to request an updated pass from the server. Have a look at the server logs to follow this process.
The iOS App
As you have seen, you don’t need a native iOS app to provide Passbook services to your users. In our case, though, it is currently not much fun to update your account balance. Every time you take a drink from the fridge, you have to launch a web browser and update your data manually. It would be much cooler if we could do this some other way.
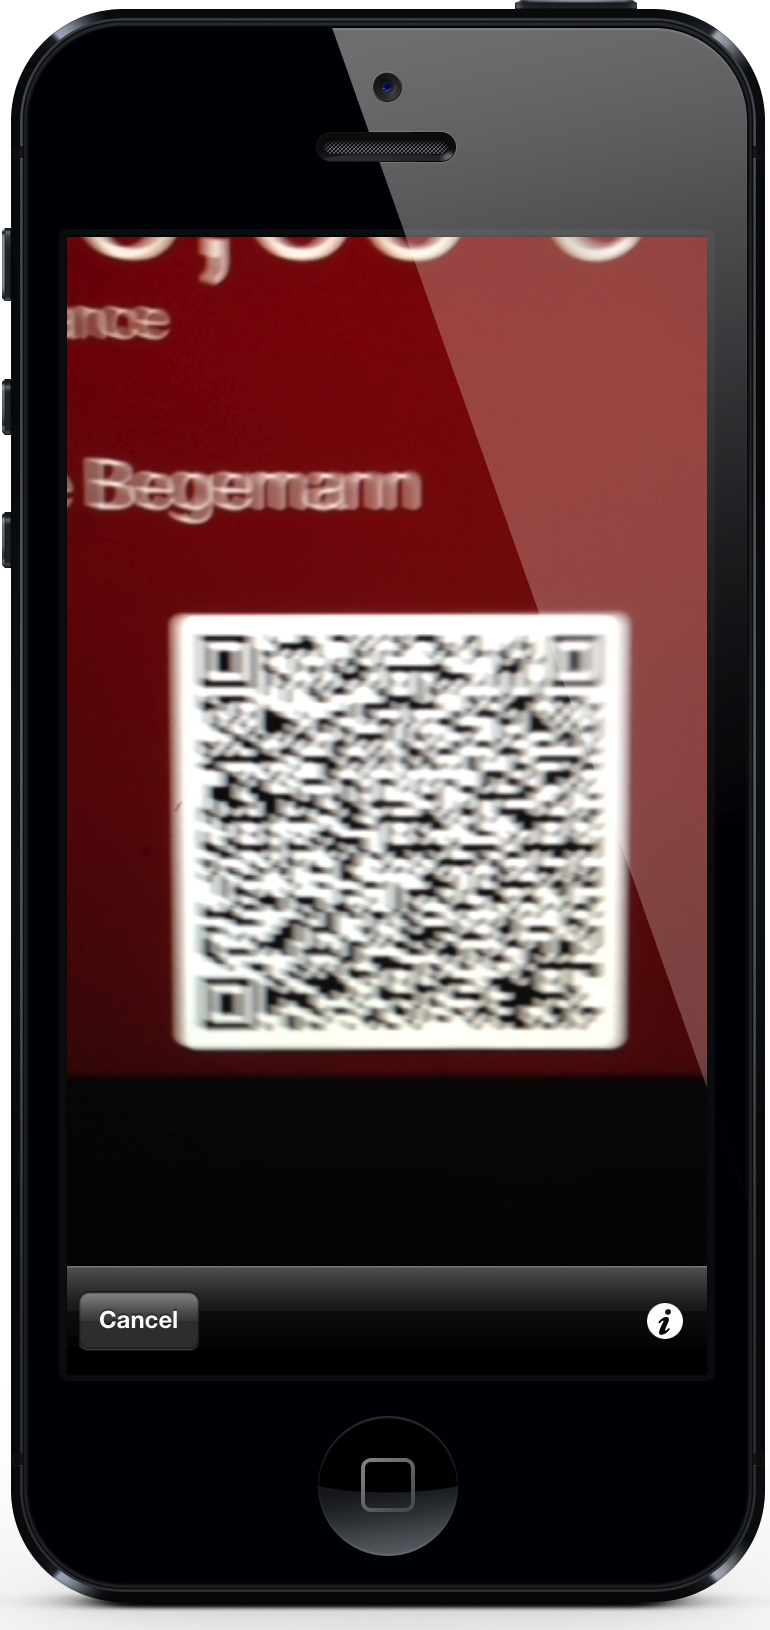
The Kaffeekasse companion app, located in the iOSApp subdirectory in the Git repository, can scan the barcode of one of our passes and update the user’s account balance. Now, we could place a spare iPhone next to the fridge, and you just have to open your pass in Passbook (it’s already on the lock screen because the fridge location is encoded in the pass), scan the barcode and update your balance.
The app is really simple. In a nutshell it works like this:
I use the ZBar SDK for barcode scanning. In my brief testing, it was the most reliable library for the types of barcodes supported by Passbook.
The QR code on my pass encodes a JSON string of the following form:
{
  "pass_type_id": "...",
  "serial_number": "...",
  "authentication_token": "..."
}
This is all the information the server needs to find a pass in the database and verify its authenticity. For obvious reasons, it is important to not encode the actual balance directly in the barcode, as attackers could otherwise try to generate valid barcodes with positive balances. The “truth” should always be stored on the server.
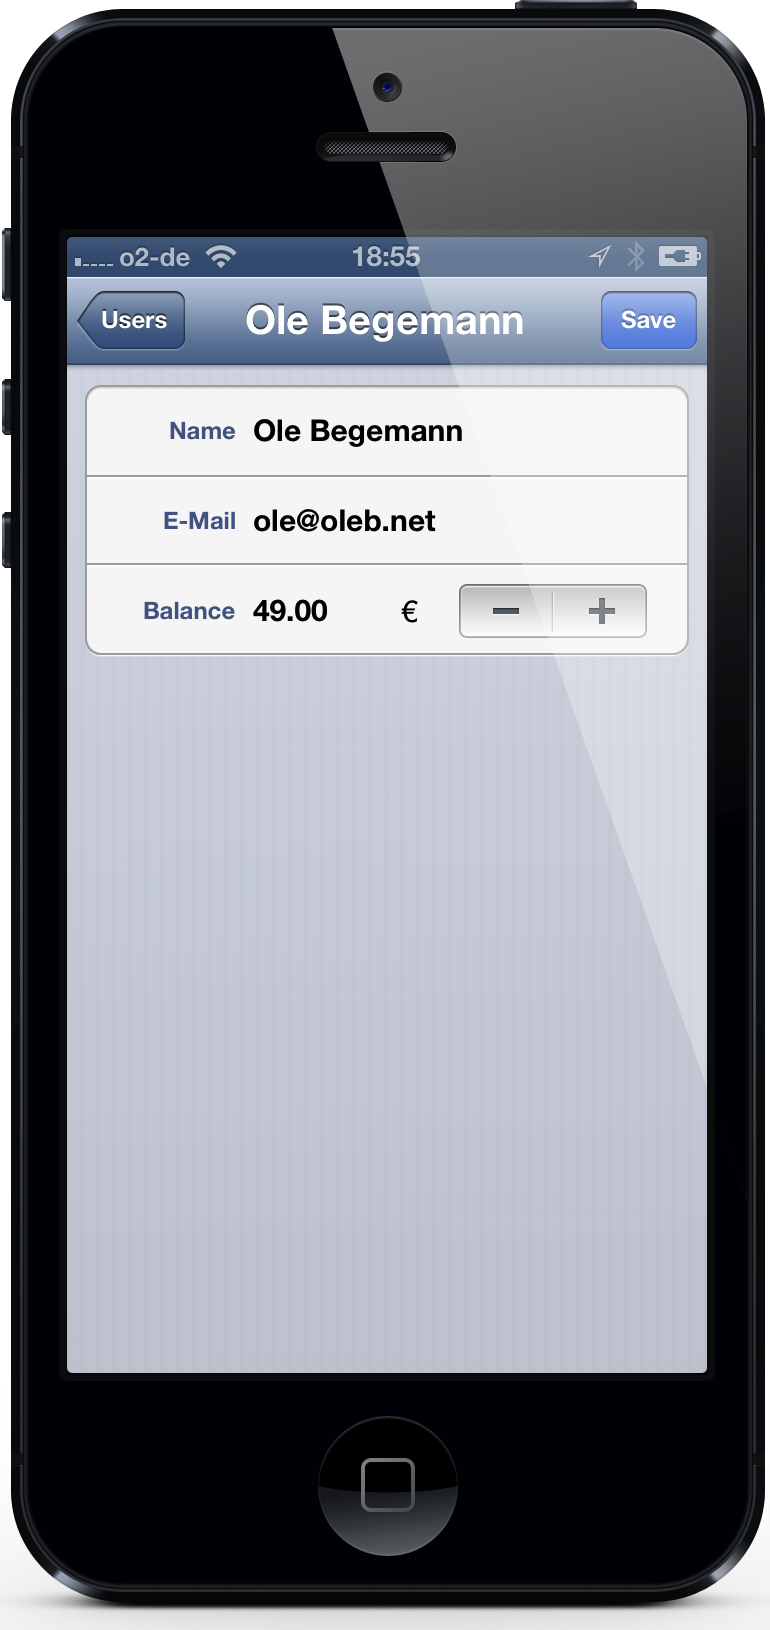
After scanning, the app decodes the QR code and retrieves the user data from the server (the user is linked to the pass’s serial number). The server implements a very simple JSON API to talk to the iOS app. After retrieving a valid user, the app presents the user’s data and lets you update the account balance.
Upon saving, the app sends any changes to the account balance again to the server. The server updates its database and, just as we saw in step 12 above, sends a push notification to all devices containing the affected user’s pass, signaling an update. In turn, the devices request an updated pass from the server and present a notification to the user.
Update March 23, 2013: The iOS app needs to know the URL of your local Passbook server. When you build it in Xcode, you will see an error in Config.m that points you to the place where you have to enter your server’s URL. Please remove the line beginning with #error … when you have done so and rebuild.
This is not PassKit
Note that the iOS app only talks to your local server, and it does so via a custom JSON API. It never uses PassKit, Apple’s framework that allow apps to interact directly with the pass library on the device, and it never contacts an Apple server.
Using PassKit, an iOS app has read-only access to passes in the Passbook library on the device (but only for passes from the same developer) and it can present a UI to let the user add a new pass to Passbook. The latter feature can be useful for email clients or web browsers that potentially need to deal with .pkpass files.
Update February 12, 2015: Updated to include the zip-zip gem in the list of dependencies. API changes in newer releases of the rubyzip gem break Apple’s pass signing library. the zip-zip gem bridges the new API to the old API.